Setup a CDK project
Install the latest CDK
If you are using Cloud9, the CDK is already pre-installed but it will likely be a few versions old. Run the following commands from the Cloud9 terminal to remove your current version and install the latest one:
npm uninstall -g aws-cdk
npm install -g aws-cdk
If the Cloud9 terminal returns an error, use the --force flag: npm install -g aws-cdk --force
Initialize project
Now, let’s create a folder within our sam-app directory where the pipeline code will reside.
cd ~/environment/sam-app
mkdir pipeline
cd pipeline
Initialize a new CDK project within the pipeline folder by running the following command:
cdk init --language typescript
Now install the CDK modules that we will be using to build a pipeline:
npm install --save @aws-cdk/aws-codedeploy @aws-cdk/aws-codebuild
npm install --save @aws-cdk/aws-codecommit @aws-cdk/aws-codepipeline-actions
npm install --save @aws-cdk/aws-s3
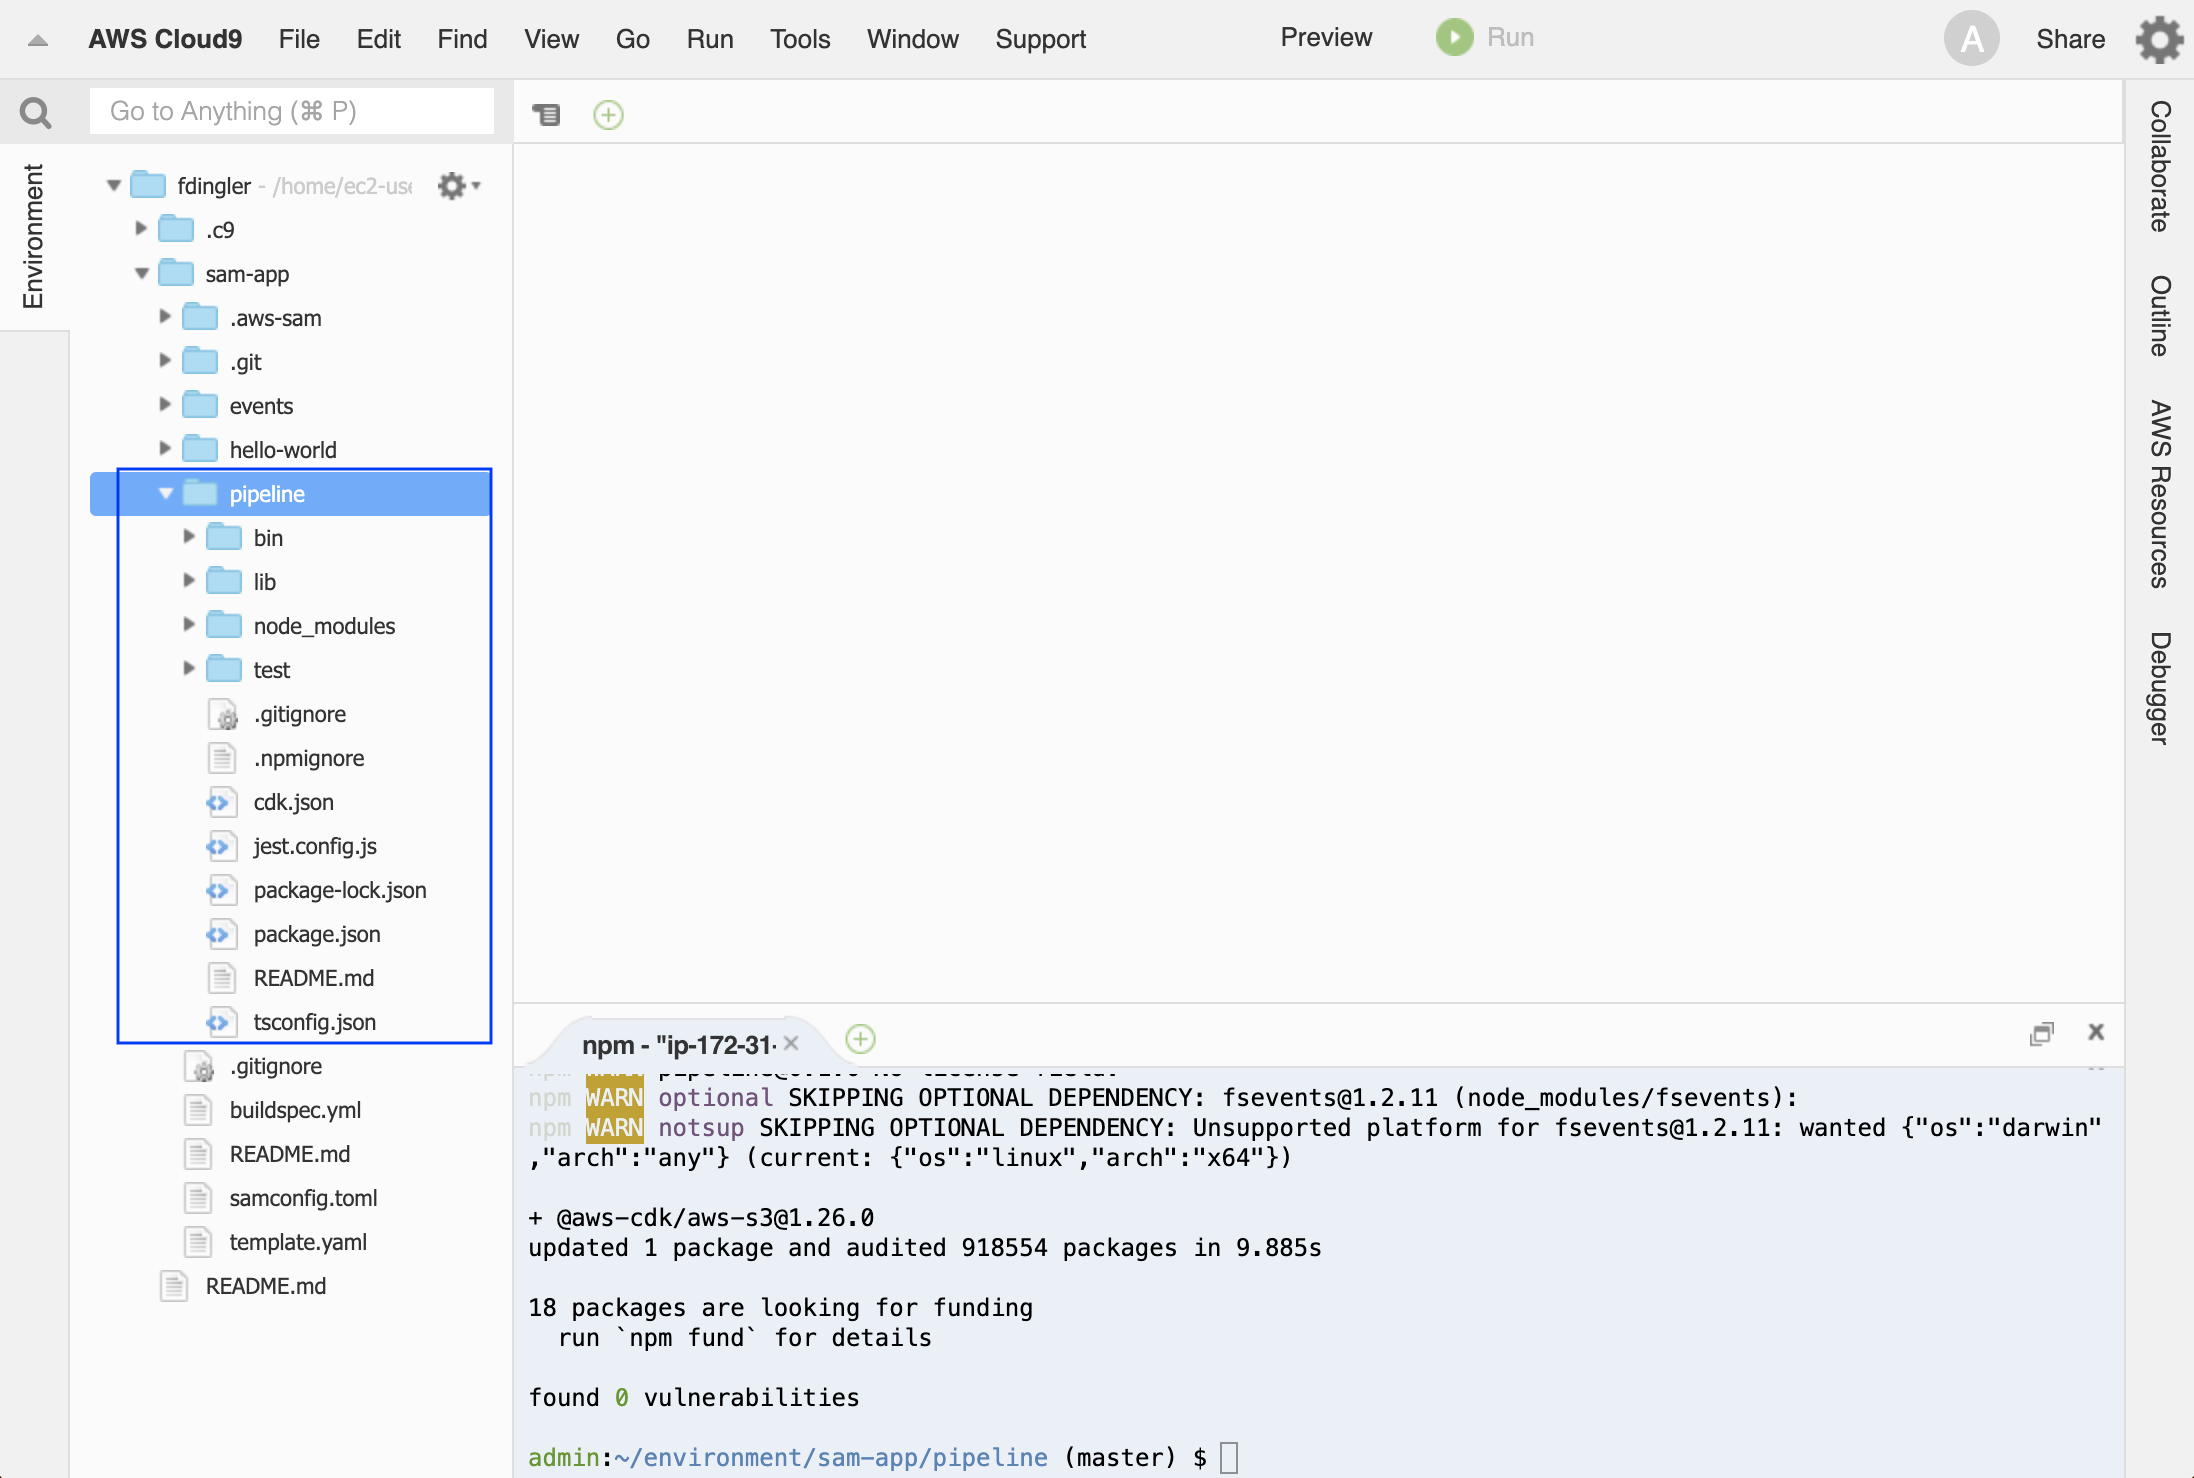
After a few seconds, our new CDK project should look like this:

Project structure
At this point, your project should have the structure below (only the most relevant files and folders are shown). Within the CDK project, the main file you will be interacting with is the pipeline-stack.ts. Don’t worry about the rest of the files for now.
sam-app                         # SAM application root
├── hello-world                 # Lambda code
├── samconfig.toml              # Config file for manual deployments
├── template.yaml               # SAM template
└── pipeline                    # CDK project root
    └── lib
        └── pipeline-stack.ts   # Pipeline definition
    └── bin
        └── pipeline.ts         # Entry point for CDK project
    ├── cdk.json
    ├── tsconfig.json
    ├── package.json
    └── jest.config.js
Modify stack name
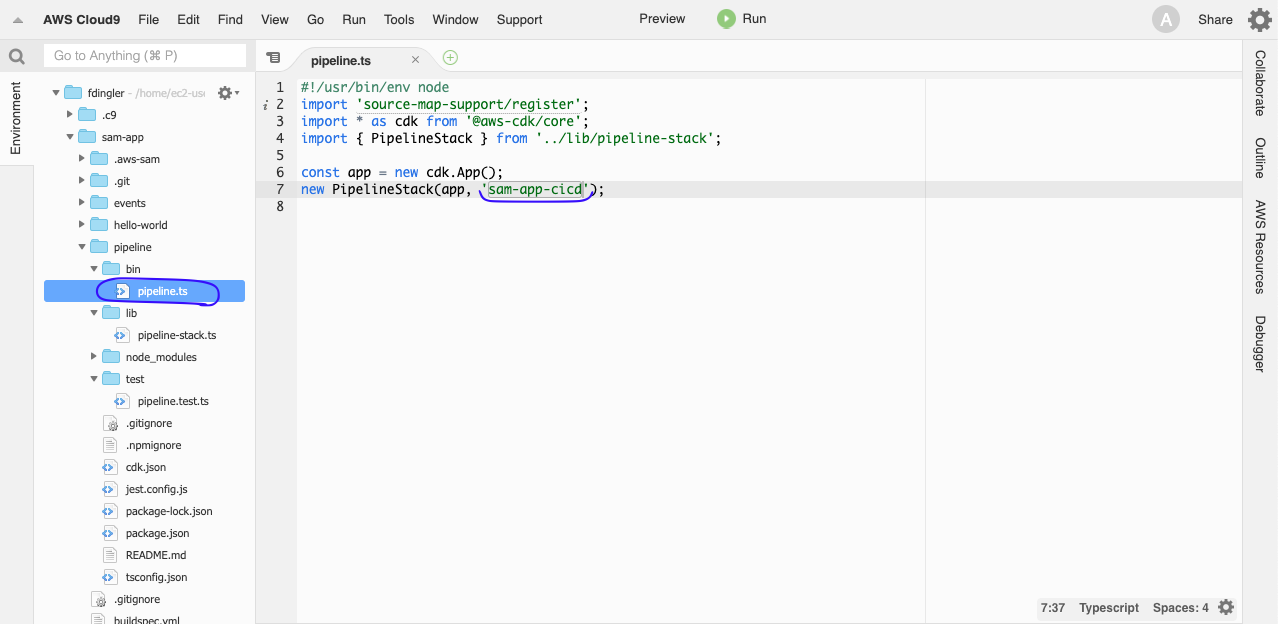
Open the bin/pipeline.ts file, which is your entry point to the CDK project, and change the name of the stack to sam-app-cicd.

Save the file.